Showing posts with label crafts. Show all posts

Monday, October 17, 2011

Getting Things Done on the Weekend

I have about four different blog posts running through my mind right now - that's how I blog. I go for two weeks without a post, and suddenly I have a whole slough of thoughts and pictures that I feel like sharing. So, be prepared for some posts this week - I'm going to hold myself back from posting them all at once!

With my work schedule and David's soccer coaching, added to taking care of Micah, I don't often feel like I get much accomplished. Our house is usually messier than I'd like it to be, I don't go running as often as I should, and many things get pushed to the side that should be priorities. This weekend, though, I decided to take control and get things done! (This includes taking time for some quality family time, of course!)

We went on Friday to dinner at David's parents' house, then to the Farmer's Market here in town, where I bought a cup of the best apple cider I've ever had. Seriously, it was so good, and I couldn't find the words to describe to David how much I enjoyed it. He didn't seem to understand what I meant by, "A little sip just fills up my whole mouth!" It was great, and now I really want some more!

Saturday morning, David, Micah and I went to breakfast at Shari's - a very fancy establishment - perfect for bringing a 14-month old who has figured out how much fun it is to shriek randomly. I just charged my camera battery, so I decided to take some photos:


Micah tasted orange for the first time, and he's in love! He gobbled up the pieces I pulled off for him - we may need to run to the grocery store.

When we got home, I got right to work painting my new/old dresser. It took me most of the day to sand it down, then paint it, but I think it turned out really good. It looks so much better! Unfortunately, it doesn't look much different in the before/after picture, but it definitely looks better in person. I painted it 'Pebble White' by Glidden, and the drawer pulls are 'Oil Rubbed Bronze' by Krylon.


I finished by about 4:30 and then got to work finishing up a project for my friend Emilee. We had talked about this project in the summer, but it took me a few months longer to get it done than I expected it would.


I used a canvas stretcher, spray-painted the same blue as my little owl, and then distressed with brown/black paint. 


I used this tutorial, updated a little to make the center a little different, to make the flowers and glued them onto the frame. The fabrics are a mix of fabrics that Emilee used in her hall decorations this year as an RA at Corban.


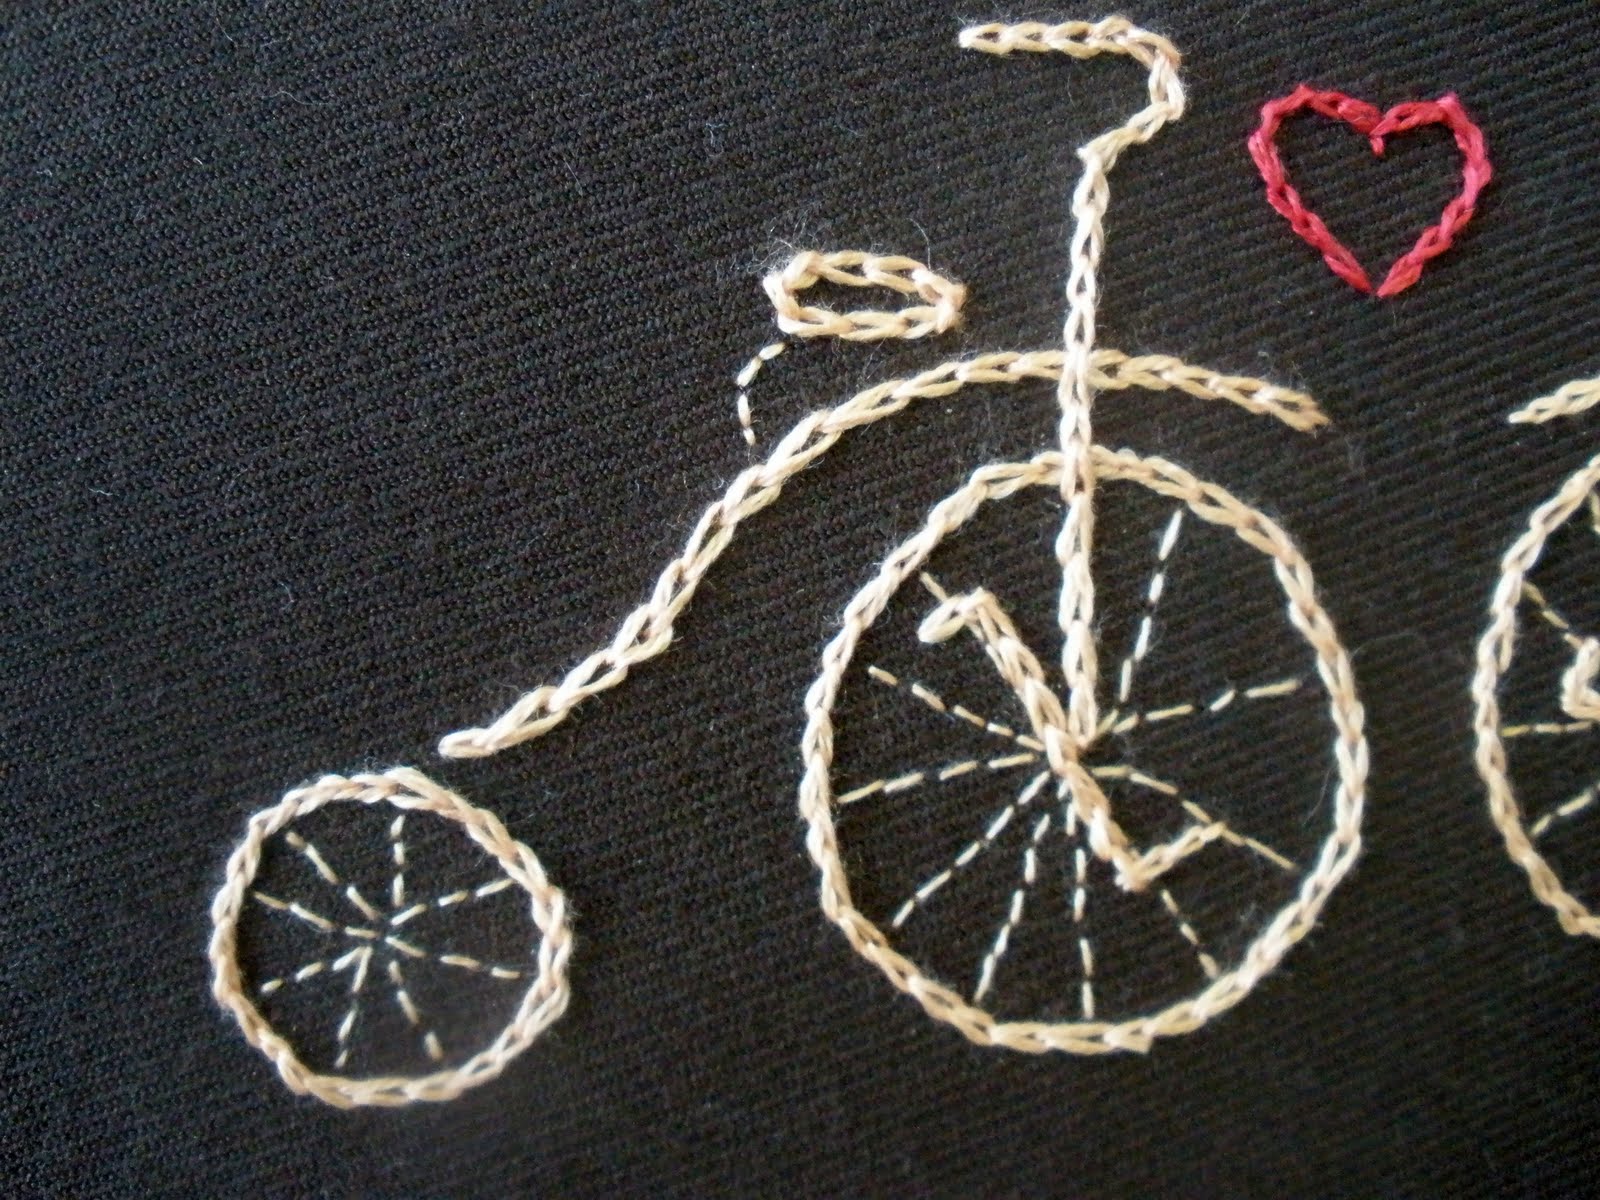
It was really a fun project to work on - I'm really enjoying embroidering! I was ready for a good rest on Sunday, after doing all this work the day before! I hope you all had a good weekend too.

Monday, October 3, 2011

What I Did This Weekend

I mentioned yesterday that I accomplished a big goal in my life over the weekend. I'm so excited to tell you about it!

When we moved into this house as a young newly-married couple, knowing it was only 800 square feet, I thought we'd only live here for a year or so. I never expected that three years and a baby later, we'd still be in this same small house. Our land lords are really great, and have made a lot of changes, including re-siding the exterior, installing new heaters last winter, replacing all of the light fixtures and windows, but it's still tiny!

To be honest, even though I complain about it sometimes, I like that the house is small - it means we're close to each other all the time, and spend a lot of time in the same spaces. We can't have too many belongings because, frankly, they won't fit! We do have a shed, so all of Micah's old clothes and baby gear are stored out there. This has really been a great place to live, even though I thought it would be very temporary.


This is the old paint, siding and windows. I need to take a new picture,
because it looks amazing with the new exterior!

I love doing crafts and making things for our house. But, in order to do crafts well, you have to have a lot of supplies and they take up a lot of space. I've been keeping most of my craft stuff in Micah's room, in an over-flowing laundry basket which has taken over half of his bedroom.

We had a major storage problem. Too much stuff, not enough places to keep it - and I want to use my laundry basket for laundry! That's where my big goal formed. I decided months ago that I needed to figure out storage for our stuff - and if I couldn't store it somewhere I needed to get rid of it! But who wants to get rid of craft supplies?

I had my eyes (and heart) set on a shelving unit from Ikea that I really love. It would have fit perfectly in our dining room, across from the table. Our old heater has an ugly vent that is still in the wall, and we don't use it any more. I wanted to not only figure out a solution for storage, but cover up the ugly vent too!

source
I love this shelving system, and the way I could buy baskets and have everything out of sight and put away. The problem, once I started looking into it, was the cost! I need to do this project on a VERY small budget. After I bought the shelf, probably half the size of the one shown, and the baskets, the cost was well over $150. Too much for my meager budget.

I've been seeing old dressers lately, that have been repainted and look really nice. I actually gave a dresser away for free on Craigslist a few months before I decided this storage issue needed fixing - I'm definitely kicking myself about that stupid decision!

A local second-hand furniture store (KC's Art and Collectibles on Main Street) had exactly what I was looking for. It was turned on it's end, and buried under a chair and some other things, but it's perfect! Once I saw it, I knew it was a great solution to our problem.


And the best part - it was only $50! Much less than I would have spent on the Ikea shelf, and way more character.

Micah finally has his room back - not that he spends much time in there anyway - and I have my craft supplies under control. I have the dresser about half full already, with something in each drawer, but there is still room for more craft supplies in the future!

My next step is to paint it, but that will be a long, slow process since it'll require sanding off some of the paint. I got a quart of white paint for free from Glidden a few months ago, so it'll be perfect for painting up this gem!

It feels so good to accomplish something I've been thinking about for months. I no longer have the stress of that growing pile in Micah's room!

Tuesday, August 16, 2011

I'm Back!

My Etsy shop has returned!

It has a new name (Laughing Turtle Designs), a new URL, and a few new items - with more to come!

I have made a few new sets of coasters:


My favorite new item, though, is this embroidered wedding shower gift, which I gave to my friend Jennifer.


I won't be selling this exact piece, obviously, because I gave it away. I will be taking custom orders though, so if someone you know is getting married, they need a hoop to commemorate their love!

Please take a quick second to have a look at my new shop sometime soon! You can get there by following this URL: http://laughingturtledesigns.etsy.com/

Tuesday, June 7, 2011

Tales of Crafting Fails

I may have mentioned this before, but I really like doing crafts. There are a lot of times when I feel proud of the crafts I make, like I've made something that might be useful and pretty.
Like when I made my first set of coasters for Christmas presents:


Or these little bow clips for Marci's baby shower back in April:


There are, however, times when I just completely fail! Lately I've had a few of those times. So, in order to further prove to you my lack of perfection to all of you doubters (and I know there are many...), here are some examples:


Like this stuffed deer mount for my friend Kara's soon-to-be-here baby, Kolbi:
  

It wasn't supposed to look like this..... Marci and I named it the 'Prairie Weasel,' as it seems to resemble a little bit of two different critters - neither of which is a deer!


(This is what the third try looked like... still a little goofy, but much more like a deer!)


I love making these little wallets:


But if you're not careful...


You end up with backwards pockets and a wallet that can't hold anything... oops! (Also, please ignore my fingers... they're not broken, they just look like it!)

Or your flap is too long so you have to cut it off and have this ridiculous seam down the back of the wallet...


My favorite though, I refer to as 'The Shirt.'

I was inspired, as I often am, by Lindsey over at The Pleated Poppy. Seriously, the girl is awesome and so creative! She does this 'What I Wore Wednesday' series where she posts each week about what she's wearing - to inspire moms to get dressed and out of their sweats and t-shirts. She has this tank-top, so cute, that she made, and I was inspired to do it too.

I didn't want to pay the $9.99 for the pattern because, obviously, I don't need one... I know what I'm doing all on my own, right?

Let's see...


Wrong. I really need to just get over myself and buy the stinking pattern.

All you crafters out there, or you non-crafters, take heart! You can do it - even if it means that sometimes you'll fail. You just laugh at your dorky deer heads, and stuff your XXXL 'adorable' tank-tops in the back of your closet!

Saturday, February 19, 2011

~ CRAFTS ~ Custom Tile Coasters

I've been having a lot of fun doing crafts lately, usually in the afternoons after work, while Micah is taking a nap or jumping in his jumperoo.

One of the fun things that I've made is customized coasters. They're super easy, and look really nice (at least I think so!). Here is a little tutorial if you want to try to make them:

What you need:
  • Four 4" tiles (I used travertine, because I like the holey texture of them)
  • Four pieces of scrapbook paper, which coordinate with whatever theme you'd like to use
  • Mod Podge
  • Polyurethane
  • A paintbrush or a foam brush


The first step is to choose your scrapbook papers. I like to have them all coordinate, and look matching. Here are some that I've used:


Once you've chosen your paper, wipe any dust off the tiles. They tend to be fairly dusty, and you want to get rid of it so that the paper will stick to the tile better. Next, you cut the scrapbook paper to fit the top of the tile. I usually trace one of the tiles onto the back of the paper, and then adjust so that each piece fits exactly. With the travertine, the edges aren't perfect, so you have to cut the paper to adjust for the little holes and dents.


Next, spread a thin layer of Mod Podge onto the top side of the tile.


Press the paper onto the Mod Podge, starting in the center and working toward the edges to remove air bubbles.


Then you take it outside, or a well ventilated area, and spread a layer of polyurethane onto the tile. This will seal the paper so that water won't ruin it. We all know that water and paper don't mix well!

When you put the poly on, it really make light-colored papers look like they're blending into the tile - very cool looking!

Let it dry for at least 24 hours so that it's completely hard, not tacky, and cover with another layer. (It's probably alright with just one layer of polyurethane, but just to be sure it's completely protected I like to add an extra layer).

When it's dry, put a little felt circle, available at Wal-Mart, on each corner of the bottom of the coaster, so that it doesn't scratch the table you use it on, and it's finished!

Now you have a customized set of beautiful coasters! Enjoy!


**I have spilled water on mine a lot, and you can't even tell. I've been using them for two months and they still look brand new. That polyurethane really does the trick in protecting the paper.